As Tulle skirts are back in fashion and I alway have ballerina envy I made a 4 layered tulle skirt and here's how to make it!
*also read instructions first because I made the mistake of not reading one of the instructions i found online and it turned out I did not understand half of what they wrote so I figured out the pattern instead
**material lengths given are optional, depending on the length you wish to have,your waist size and how many layers you wish to make
Materials:
- 6 m tulle fabric (I bought 7m as I wanted a lot of underskirts but didn't end up using it all)
- 1,5m lining fabric
- scissors
- tape measure
- pins
- thread (in the colour of your tulle)
- medium elastic or large
- ribbon (optional) and thread in the colour of your ribbon
1. Start of by first measuring your waist and the length you wish your skirt to be.
mine was: waist:75cm (add a few extra cm depending how gathered you want it) and length 59cm. (Its wise to add an extra 5 cm as it will be used for the elastic)
2. (cut up the material for the different skirt parts, i cut every 1.50m) Fold your material first in half width then length wise
3.With a simple calculation you can work out the radius for your waist line: Waist measurement divided by (2x3.14) so 75/6.28 =11.94cm rounded up to 12cm (if you want the skirt to be really gathered add a few more cm's to the waist)
4. Now in the corner where the 2 folded edges meet, measure out the radius, use pins to mark the line, to help you could tie a string to a pen to help draw the curve onto the material.
5. Do the same with the outer line, from where your drew the waist line measure out the length of the skirt. all in all from the corner of the fabric I measured 71cm (12cm+59cm)
6. Now cut neatly along the lines to get something like this
7. Repeat from 1 depending on how many layers you want as well as with your inner lining
8. pin all the layers together
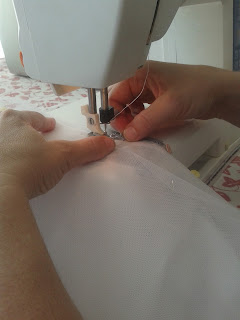
9. With a larger stitch, sew the 4 layers together about 1cm from the edge. Once down grab one thread from one side and start pulling to gather the material to your original waist size, if you cut the waste you have more to gather and if you cut it exactly,you can only gather slightly to not make the skirt too small
10. measure your elastic waistband (stretch it out) and then sew the ends together then pin it loosely to the inside of the skirt waist, place it just below the gathered stitch. Sew the bottom of the band first. Remember to stretch it while sewing!
11. Fold over the material above the gathered stitch to hide and stitch it down, while still stretching the material
Tadaaa its done!
Here's how to sew a ribbon on but that is completely optional
How to sew the ribbon:

When picking the ribbon keep in mind how much you want for the bow at the back, it's always easier to make it shorter at the end then chopping it all of earlier. Also bear in mind when attaching it, it will not stretch with the elastic and so make it harder to get into the skirt this is why I only sewed the front half on and left the rest loose
1. fold the ribbon in half to determine the middle then pin it to the front middle of your skirt.
2. Stick another 2 pins on each other sides to show where you want to stop sewing and leave it loose to be able to tie.
3.Sew the top and bottom edges on from either inside or out (I choses outside so i could see if my stitches were nice and straight)
In the end it makes a very cool skirt


No comments:
Post a Comment