Saturday, 26 July 2014

Surviving Uni

So as Im of to Uni in a month one of my oldest,dearest,bestest friend of mine said goodbye and i recieved an awesome uni survival kit with a load of messages and envelopes as well as a lot of earings, makeup, sweets, razor ,bublebath (which unfortunatly i wont have) and a great big red envelope which i am not aloud to open until i get there
i have a feeling im going to cry when i read it
but thats for future me to worry about.

Sunday, 23 February 2014

Rajz és vizuális kultura kerettanterv

Az egyik legidegesítőbb dolog, hogy a rajz és vizuális kultúra közép illetve emelt szinű keretantervére nincs sehol se kidolgozott példány.Sem a fogalmakra, sem a megadott képekre egy összesített gyüjtemény. Még úgy döntöttem, hogy megprobálom összegyűjteni nem tudom, hogy ez lehetséges e hogy más szavait átmásolom erre az egy helyre. Így inkább csak idelinkelem amit használtam. S esetleg majd bemásolom összeszedeten amikor megvan az összes fogalom.

Eddig is ez az oldal nagyon hasznos.bár több dolog is hiányzik. S a tanárom néha pontatlannak találta:

http://www.kepszotar.hu/

Illetve nagyon hasznos beszerezni egy jó müvészeti lexicont (anitkváriumban elég jók találhatoak) bár azok is elég sok helyen hiányosak pl. a film és a photo fogalmakkal.

ha már készen kidolgoztam lehet hogy ide kirakom


Saturday, 28 September 2013

how to make a chest

here's a simple way of making a chest.

you will need: 

  • Cardboard - box and cardboard
  • scissors
  • glue gun/glue
  • pens
  • paint


demonstration of flaps
1.Measure out the plain cardboard sheet so it is the same in length as the shoebox or cardboard box you are using. Luckily mine already had indentations in it so it was easy to fold into a nice top shape i wanted. If not lightly run a pair of scissors on the line you want to crease to make it easier.  Also leave little flaps where you will be able to join the two together and hold together the top.

2. once you have the shape of the top. measure out the sides and cut appropriate sized and shaped cardboard forms. Gluing the sides on was the trickiest part as the flaps kept coming apart when drying. Apply a heavy wait onto it.

3. Once its dry see if it still fits onto the box if not do the final adjustments now before you paint. The top of mine was to big so i had to trim it a bit. Also decide if you whant the top and the box to join together. If yes glue to small flaps on one side to the inside of the box. If you just want to beable to lift of the top then you can cut the flaps of. And TADAM! you're ready to decorate!

i was rushing and didn't have enough time to wait for the glue to dry so i unfortunately had to use masking tape to hold it together

Friday, 27 September 2013

How to make wands

This is a simple way to make wands. I heard this from a friend who saw it somewhere so it isn't my idea
you will need:
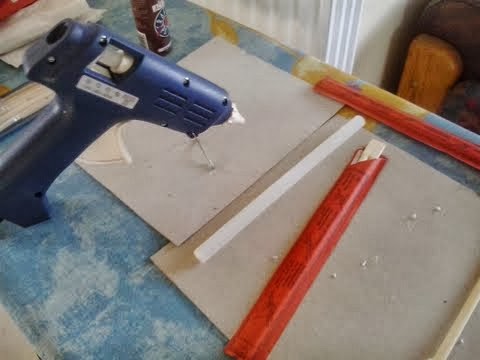
  • Chopsticks
  • aquvarell paint (brown,black)    
  • gluegun
  • beads


1. Heat up your glue gun, and cover the parts of your chopstick that you wish to use as the handle, you can use all sorts of patterns where you wish the wood to come out a bit, if you wish when its cooled a bit you can use your hands to shape it. Also you can add beads of different sizes to add a bit of character to the wand.


2. once the glues set you can start to paint them. then leave them to dry. I added another layer so the glue was completely covered.


3. And then you're basically done! now you can do some extra tinkering. for example i added the gold streak at the end when trying to make Hermione's wand.

Wednesday, 14 August 2013

Firenze day 2

So today we mostly visited museums like the Uffizi to Medici's palace. So I have less pictures since we couldn't take any in the museums (unfortunately ;( )

sight from the balcony of the Uffizi
grave of Danti
grave of Galileus Galileus
grave of Machiavelli


grave of Michael Angelo


Tuesday, 13 August 2013